

Tart has fancy ring to its name, but simply put, it’s just a pie without the top! Since it doesn’t have a top to cover everything, it usually leads to prettier/fancier presentations so it just looks a lot more delicate. With that, I have to say I tend make WAAYYYY more tarts than pies.
I make a lot of dessert tarts, but I absolutely love savory tarts. Pretty much anytime I find a rare, fresh ingredient that’s special, and tastes amazing on it’s own, I tend to put it in a tart to make that ingredient the star.
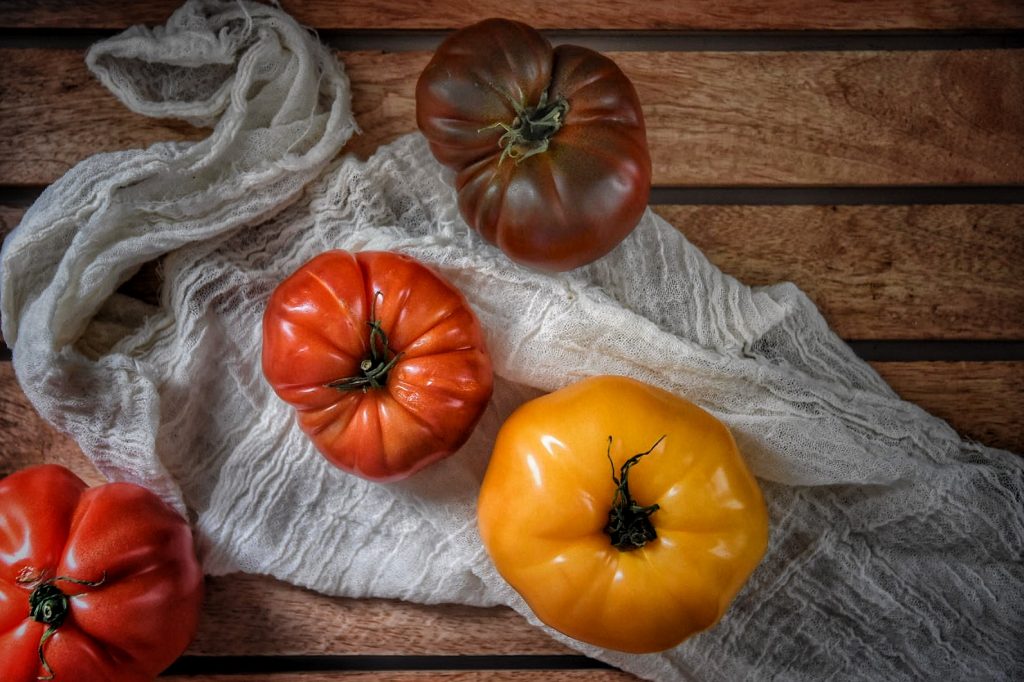
So when I saw these gorgeous heirloom tomatoes, I had to make a tomato tart!

About Tarts:
As I mentioned, a tart is a very close relative to a pie, but tarts actually came YEARS after pies… about 200 years after! In the beginning, pies were considered poor man’s dish, while tarts were served to high class crowds. What’s more interesting (to me) is that in the beginning, tarts were actually considered a savory dish, and usually had a meat or fish filling! Interesting, because nowadays there are way more dessert tarts than savory!
Just like google says “an open pastry case containing a filling.” The base is a shortcrust pastry and you can layer it with whatever you wish.
About This Recipe:
I used a homemade dough here, but if you can get your hands on some store bought dough… by all means use it, I do it all the time. I also like using frozen puff pastry dough sometimes, works beautifully! But, if you do make the dough, I definitely recommend making a big batch. This dough is very freezer friendly just take it out a couple hours before using and you got fresh homemade dough every time!
Key to a great dough: use frozen butter and do not knead the dough! Right before you’re about to make the dough, put the stick of butter in the freezer for 15-20 minutes. You can cut the butter into small cubes or I like to use a large grater to grate my butter into the flour. Also, you shouldn’t have to knead the dough at all. Just add cold water, a few tablespoons at a time, until it just comes together into a crumbly ball. Which is a great thing because it requires less work 🙂
I made my own basil pesto here but you can definitely use store bought pesto, they have some great ones at the supermarkets nowadays.
Last thing, if you can’t get your hands on heirloom tomatoes, just use regular tomatoes. You’ll wow yourself and your guests just as much!
I know it looks like a lot of steps, but it really is fairly simple and is just SOOOOOO WORTH IT! And if you’re using store bought dough and pesto, just skip to step 5!
Important for a great tart:
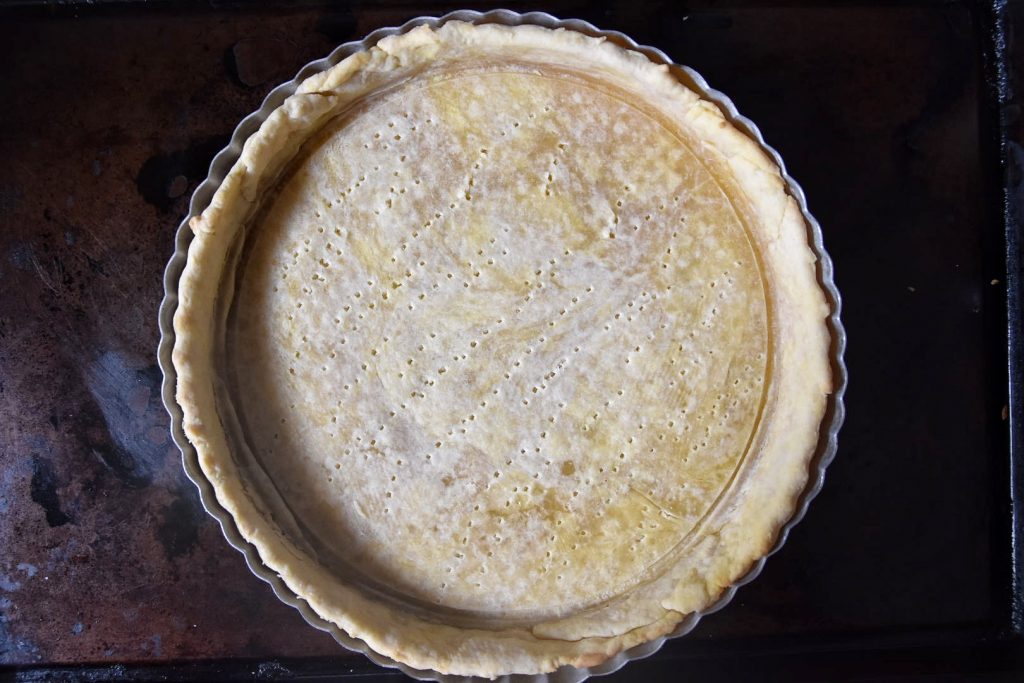
- It is important to pre-bake the pastry dough before spreading the pesto and tomatoes on it, otherwise you’ll end up with soggy bottom.
- Make sure your start ingredient, heirloom tomatoes, are fresh!


Ingredients:
Serving size:
9″ Tart
Makes about 6 slices
Dough:
- 1 1/4 flour, extra for rolling
- 3/4 stick frozen unsalted butter
- 1/2 tsp salt
- 1 tsp sugar
- 1 large egg yolk, whisked
- 1/4 cup ice water
Filling:
- 1-2 ripe heirloom tomatoes, about 10 slices (1/4″ thick)
- 1 cup basil leaves (loosely packed)
- 1 garlic clove
- 2 tbsp pine nuts
- 1 tsp lemon zest
- 1/4 cup olive oil
- 2 tbsp Parmesan cheese
- Salt to taste, remember the cheese is already salty
- Freshly grated Parmesan for garlic (optional)
Instructions:
If you’re using store bought dough, skip steps 1 and 2.
If you’re using store bought dough and pesto, skip to step 5.
- Add the flour, salt, sugar in a large bowl. Use the large side of a grater and grate the frozen butter into the flour**see note 1. Use your hands, or a pastry blender, to break the butter into the flour, until the mixture has a crumbly, cornmeal-like texture.**see note 2
- Add the egg yolks and mix it in. Then Add the ice water, a few tablespoons at a time, until the dough starts to come together and forms a crumbly ball. Wrap it in plastic wrap and refrigerate for 30 mins.
- Preheat the oven to 425 degrees.
- While the dough is resting, make your pesto. Add everything but the olive oil into a food processor (or mortar and pestle) and process until finely minced. While the motor is running, pour in the olive oil until combined.
- Take the dough out of the fridge. Roll the dough on a lightly floured surface, adding more flour only as needed to keep it from sticking to the counter/surface. Once the dough is large enough to cover the bottom of the pan and go up the sides, carefully transfer the dough to the tart pan (use the rolling pin to transfer). Press the dough to the bottom of the pan firmly, then press into the sides indentations using your fingers. Use a knife to remove excess dough from the sides of the pan. Using a fork, prick the bottom of the crust for ventilation.
- Take a pot/pan that just fits into the tart and spray all sides of it with non-stick spray. Fill 3/4 of the pot with water and cover it. Put it right on top of the tart, to weigh it down, and bake for 20 minutes. Once done, take it out and let it cool down.
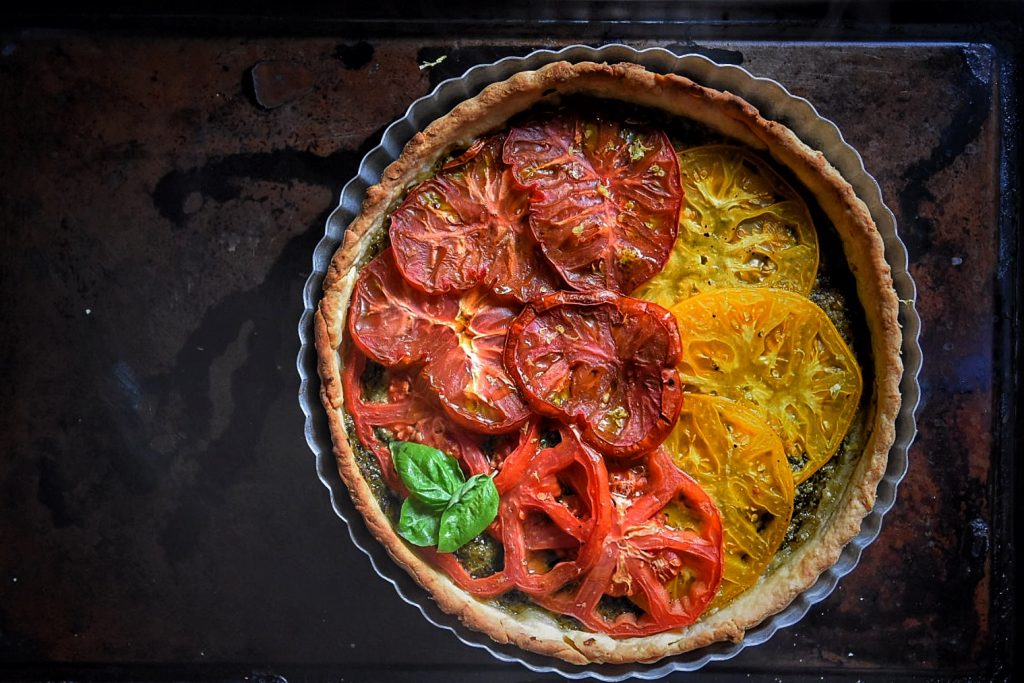
- Once the par-baked crust has cooled down, spread a thick layer of the pesto on the crust. Arrange the sliced tomatoes on top of the pesto, overlapping each slice slightly, as you fill the pan in a single layer. Sprinkle a tiny bit salt, remember the crust and pesto both are already salty.
- Bake at 425 for 30-35, until the tomatoes appear roasted and slightly browned on the edges.
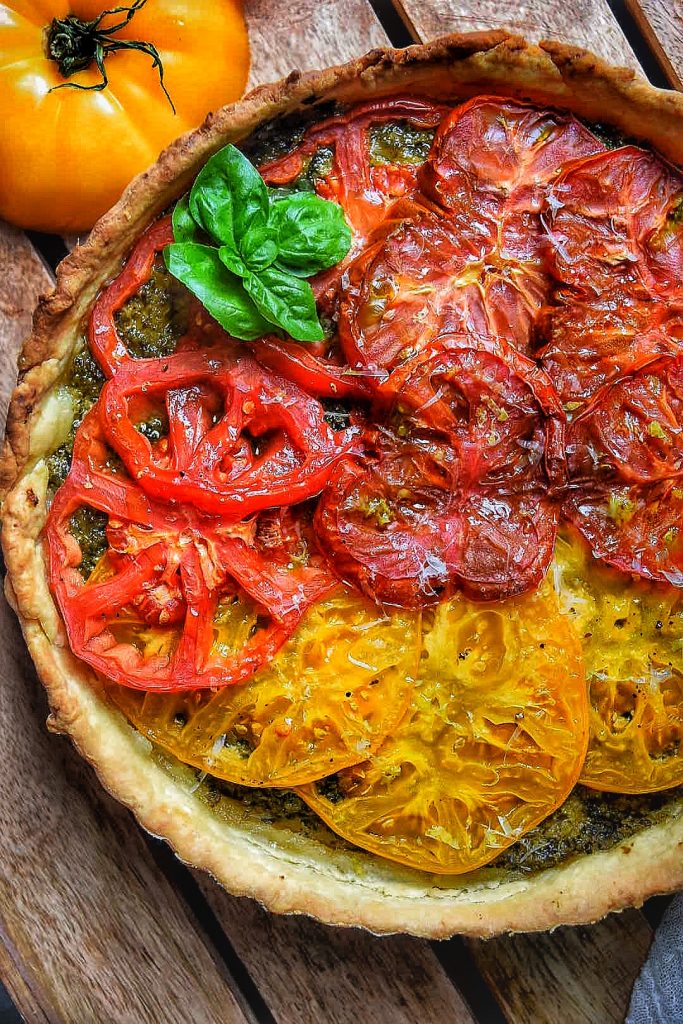
- Drizzle on some olive oil, sprinkle on some parmesan. Serve while warm or room temperature.
Note:
- If you wish, you can cut your butter into small cubes instead of grating. The idea is to make tiny dots of butter while not letting it melt or get warm from the heat of your fingers.
- If you prefer, you can make the dough in a food processor. Just remember not to over mix, just pulse it a few times until it just starts to come together, then transfer to a bowl and chill.
